


These command line tricks will help you expedite your Kubernetes tasks 🏃🏻♂️💨


Table of contents
- 1. Make use of aliases 🖇️
- 2. Dry run like a pro 😎
- 3. Using autocomplete 🤖
- 4. Setting default namespaces 🚀🛰️
- 5. Using kubectl explain 📚
- 6. Using these kubectl cheatsheets 🎼🏃🏻
- Conclusion 🤔
- Here are some related interesting stories that you might find helpful :
- GitHub URL for this article 💻
- Connect with Me on Social Media

The most crucial Kubernetes command-line tool, kubectl, enables you to execute commands against clusters. You control Kubernetes using Kubectl, which is the primary command-line tool for Kubernetes. Kubectl is best thought of as SSH for Kubernetes, which is a useful analogy. It is offered for Windows, Mac, and Linux.
In general, kubectl transforms simple commands into the JSON payload needed by the API server. To determine the cluster and API server endpoint to POST to, it needs a configuration file.
In this article, we’re going to go through some quick and easy tips & tricks that will help saving valuable time and making the most out of kubectl. If you’re still new to Kubernetes, you might want to go through my previous article, which introduces you to k8s concepts etc.
1. Make use of aliases 🖇️
Setting up some aliases for running kubectl is really helpful because Kubernetes commands can be very long. When you wish to run several Kubernetes commands at once, it will be much simpler because you won’t have to repeat the complete command every time.
Here’s how you create aliases on your machine : https://phoenixnap.com/kb/linux-alias-command
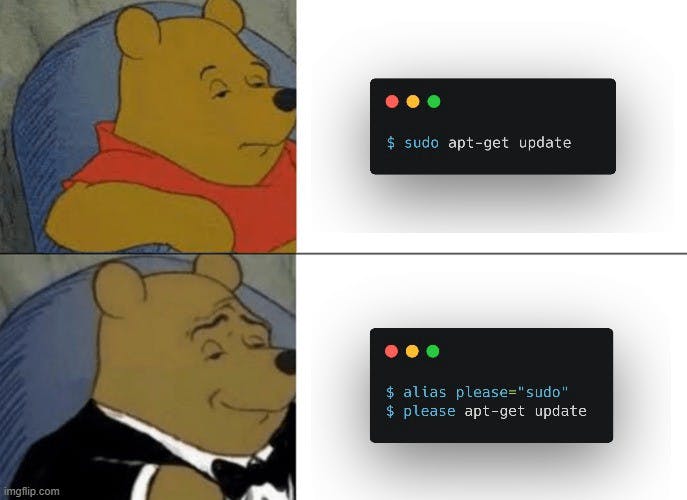
Aliases for a few regularly used commands are shown below. To save time, run these before executing kubectl instructions. Instead of typing kubectl , you just need to type k :
Want even more of these? Visit this kubectl-aliases GitHub repository which is a true haven for fans of aliases.

Note : Aliases can be dangerous at times, please use wisely.
2. Dry run like a pro 😎
The --dry-run flag of the kubectl run command (as well as create, apply, and patch) is a fantastic feature that lets you see the anticipated changes without actually executing them.

This command outputs the manifest of the needed object when used with -o yaml
For instance :
kubectl --dry-run=client -o yaml run alpine --image=alpine > alpine.yaml
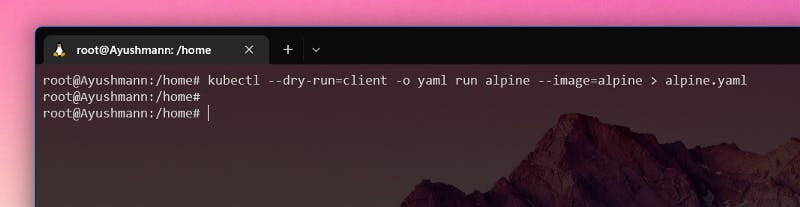
this will produce the following YAML (alpine.yaml) :
Now all you have to do is save it to a file, remove a few system or superfluous fields, and you’re done. ⏩
3. Using autocomplete 🤖
In Kubernetes, you can autocomplete fields! Even though setting this up takes around five minutes, it’s worth the first investment.
How many times have you tried to type kubectl commands while pressing the TAB key before realizing it doesn’t work? Here’s a trick, though. A bash autocomplete plug-in that you install in your .bashrc file will function flawlessly.

You must first configure bash autocompletion before you can enable kubectl autocompletion. This is really helpful if your aliases aren’t enough or if writing out the entire command would make you too lazy.
Use the following command to do that :
echo "source <(kubectl completion bash)" >> ~/.bashrc
By merely pressing the TAB key, you can now autocomplete commands, which is quite useful and saves a tonne of time.
Note : Your operating system will have some influence over the instructions.
4. Setting default namespaces 🚀🛰️
Kubectl is one of the most crucial sets of Kubernetes commands. It is simple, adaptable, and highly effective. But kubectl has one significant drawback. To define where you want to construct your pods, services, or deployments, you must always use the option --namespace.
If you choose not to use this option, your objects will probably end up in the wrong location.
The following command can be used to avoid this :
kubectl config set-context $(kubectl config current-context) --namespace=yournamespace
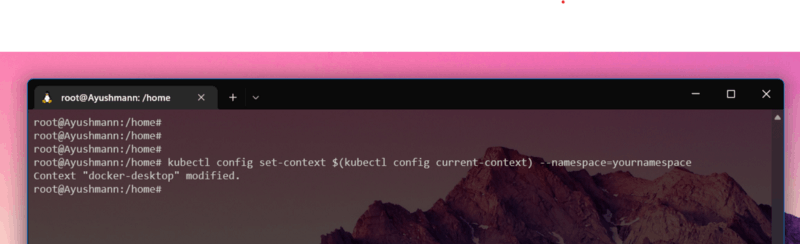
Note : Replace
yournamespacein the above command to replace with your desired namespace
5. Using kubectl explain 📚
Instead of repeatedly visiting the online documentation, use kubectl explain. It is simple to comprehend and gives you sufficient details about a resource standard.
For illustration, let’s use kubectl dry-run to build a pod and then kubectl explain to learn how to add resource requests and limits to the pod.
Let’s now create the manifest for the pod using a dry-run :
kubectl --dry-run=client -o yaml run alpine --image=alpine
As you can see, the pod’s spec.containers section contains the resources section. Now let’s do kubectl explain :
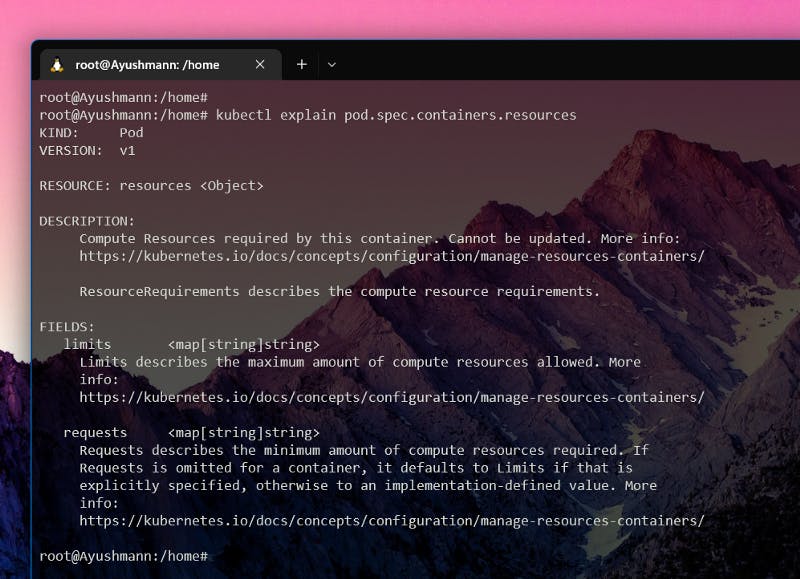
That should be sufficient information to get you going. To examine potential values and pertinent information, see the dnsPolicy and restartPolicy specifications.
kubectl explain pod.spec.dnsPolicy kubectl explain pod.spec.restartPolicy
6. Using these kubectl cheatsheets 🎼🏃🏻
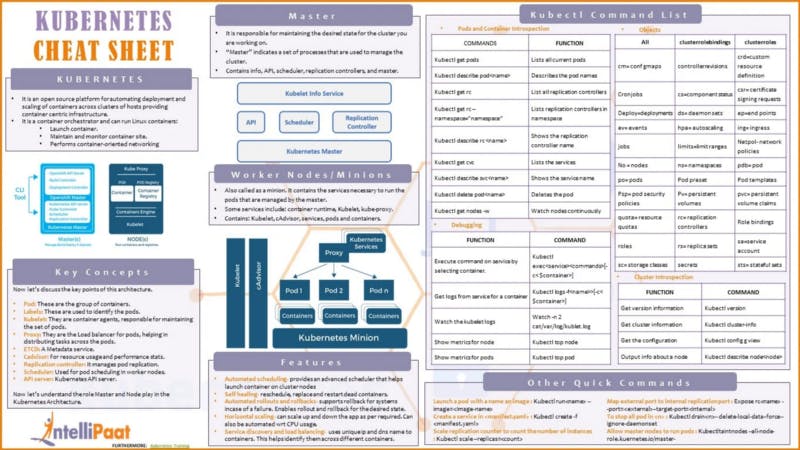
Courtesy : https://intellipaat.com/blog/tutorial/devops-tutorial/kubernetes-cheat-sheet/
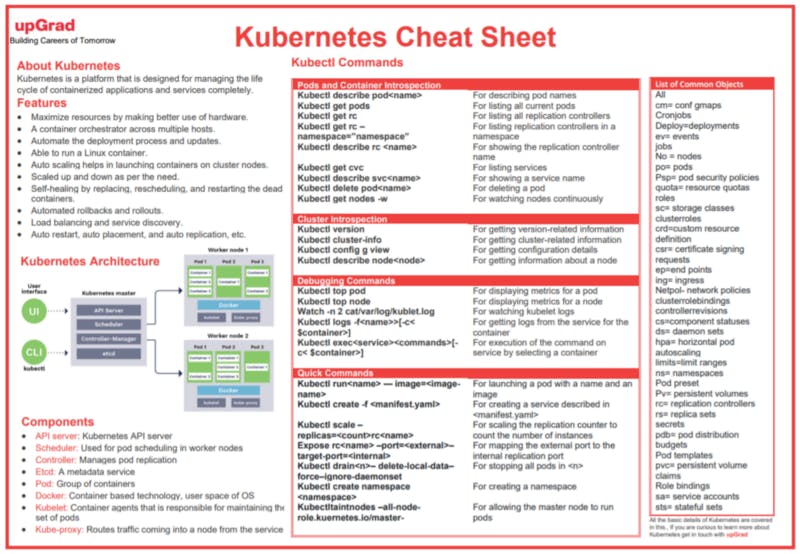
Courtesy : https://www.upgrad.com/blog/kubernetes-cheat-sheet/
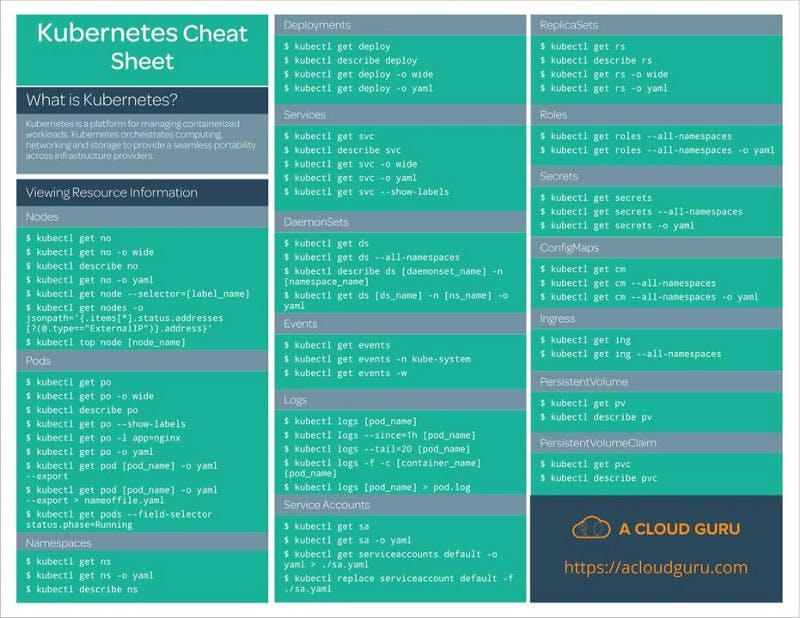
Courtesy : https://acloudguru.com/
Conclusion 🤔
These pointers can really help you advance in your Kubernetes profession and have a great Kubernetes experience. You are free to employ whatever makes your task simpler and to come up with your own creative strategies for doing so.
Gratitude for reading. The article was enjoyable, I hope.
Here are some related interesting stories that you might find helpful :
Docker for rookies 🐳
*One of those services you may have never used but always hear about is Docker. Prior to my investigation into the…*devangtomar.medium.com
Colima (Containers on Linux on Mac) 🐋
What is Colima? 🤔devangtomar.medium.com
Podman (An alternative to Docker !?!) 🦭
What is Podman? 🤔devangtomar.medium.com
GitHub URL for this article 💻
GitHub - devangtomar/medium-k8s-tips-and-tricks
*You can't perform that action at this time. You signed in with another tab or window. You signed out in another tab or…*github.com
Connect with Me on Social Media
🐦 Follow me on Twitter: devangtomar7
🔗 Connect with me on LinkedIn: devangtomar
📷 Check out my Instagram: be_ayushmann
Ⓜ️ Checkout my blogs on Medium: Devang Tomar
#️⃣ Checkout my blogs on Hashnode: devangtomar
🧑💻 Checkout my blogs on Dev.to: devangtomar