


Table of contents
- Why do we need Docker? ❓🙋🏻♂️
- Now what Docker is? 💭
- Now what are Docker images and containers? 😵
- Installing Docker on your machine ⚙️
- Now let’s create your first application 🙋🏻♂️
- Creating your dockerized application 🌻
- Push image to DockerHub 📌
- Conclusion 🤔
- GitHub URL for this article 💻
- Connect with Me on Social Media

One of those services you may have never used but always hear about is Docker. Prior to my investigation into the DevOps industry, I had never heard of or utilized Docker while I was in college. A prerequisite for joining a modern development team is having a working knowledge of Docker. Docker has soared to the top of the popularity lists, and there are good reasons for this.
This article’s goal is to ensure that you understand by the end of it what the hell Docker is, why we need it, how to set it up on your laptop, and perhaps even a basic Dockerfile. (Don’t worry! We will discuss what a Dockerfile is 😏)

If you are familiar with Docker, you might want to read my posts on some alternatives I assessed. Now let’s get started
Why do we need Docker? ❓🙋🏻♂️
Due to the widespread use of virtual machines on servers, Docker is required. Using a major company as an example, maintaining these machines is a full-time job for a company that employs hundreds of servers with a cluster of virtual machines for each of its platforms. An OS must be installed on each server, which also requires periodic updates and patches as well as the installation of dependencies for the software that each machine runs.

It is clear why this quickly becomes extremely complicated. Since manually configuring these servers is impractical, many businesses maintain a list of servers that they routinely update through programming. This is feasible, but because a team of individuals shares the list of servers, it is not always accurate. Some servers never receive updates, which can lead to mistakes that have an effect on system performance. It can also be a nightmare to debug if there is just one bad server in a room full of hundreds. How does Docker addresses this concern? 🤔

Now what Docker is? 💭
One solution that made use of the concept of isolated resources was Docker. It is a collection of tools that enables applications to be packed with all required dependencies installed and run wherever desired. The containers are described as follows by Docker:
A container is a standardized software component that wraps up code and all of its dependencies to ensure that an application will run swiftly and consistently in different computing environments.

Thoughts like “this is the same as virtual machines” are audible to me, yet there are some distinctions:
Docker containers don’t have separate, dedicated hardware-level resources that would allow them to operate independently; instead, they share the same system resources.
They don’t have to contain an OS in its entirety.
They enable the operation of several workloads on the same OS, allowing for resource-efficient resource consumption.
They are quite lightweight and effective since they mostly involve dependencies at the application-level. A computer that can operate two virtual machines and tens of Docker containers without issue translates to less resources, lower costs, and happier users.

Comparison of containers and virtual machines
Now what are Docker images and containers? 😵
Containers and Docker images are separate concepts, despite being closely related. Since Docker images cannot be altered, they are immutable. I have previously explained that rather than running applications directly on an OS, these images can be uploaded to servers. Images include all of the files an application requires to run, including the source code, libraries, dependencies, tools, and other files. When using Docker, we begin with a base image. Since images can get very huge, they are made to be comprised of layers of other images to transmit them over networks using the least amount of data possible.
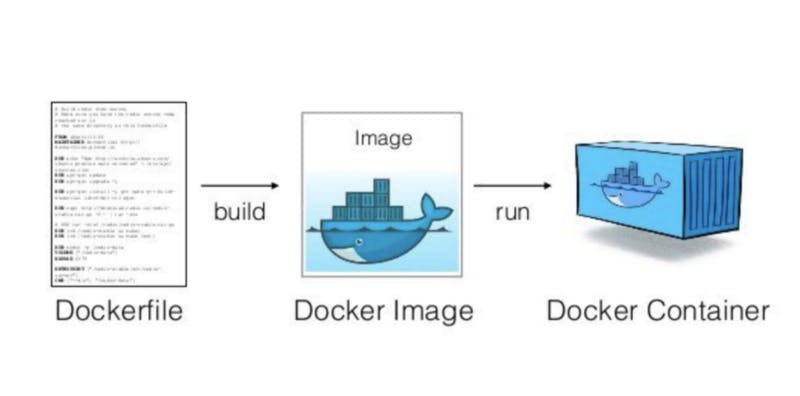
Docker lifecycle
A container is an instance of an image. Containers are instances that are currently executing and have top writable layers; they execute the actual applications. The readable layer is also erased when the container is deleted, but the underlying image is left in tact. The major lesson here is that you can run several containers off of a single picture.

The following metaphor is a helpful way to think about images and containers: Containers are the cakes you bake, and images are the recipes for making a cake. A recipe can be used to create as many cakes as your resources will allow, and an image can be used to create as many containers as your resources will allow.
Installing Docker on your machine ⚙️
- For Ubuntu:
Update your packages first:
sudo apt update
Next, use apt-get to install Docker :
sudo apt install docker.io
Lastly, make sure Docker is properly installed :
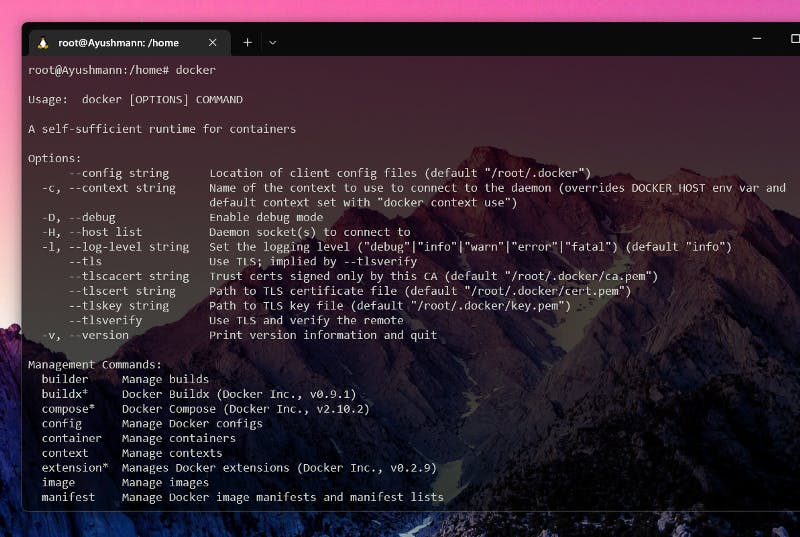
Once Docker has been set up. We must confirm it, therefore run the next command to do so. All of the options that are available for the docker and that you can use are listed by this command.
docker
Docker command ouput
sudo docker run hello-world

Pulling and running hello-world docker image
Now let’s create your first application 🙋🏻♂️
Create your first application now that you are familiar with Docker!
Making a Python program that displays a sentence is the goal of this brief tutorial.
Dockerfile will be required to start this program. Once you comprehend the procedure, you’ll find that it’s not all that difficult.

Reminder: Python won’t need to be installed on your machine. The Docker environment will decide whether to include Python with the intention of running your code. Python installation guide.
Creating your dockerized application 🌻
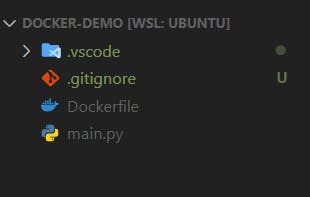
You’ll need 2 files :
A file named main.py (python file that will contain the code to be executed).
A file named “Dockerfile” (Docker file that will contain the necessary instructions to create the environment).

You should typically have the following folder structure :
Directory structure
Also, your Python code may be as straightforward as printing “hello world”
import sys

print("Hello there! This is a demo of python script inside Docker
container!")

print(sys.version)
Here’s goes your Dockerfile :
#Deriving the latest base image*

FROM python:latest

LABEL Maintainer="ayushmanndev"

WORKDIR /usr/app/src

COPY* main.py ./

CMD* ["python","./main.py"]
You can simply run the following command to create your image once you have this file and have given it the name Dockerfile :
docker build . -t my-image:my-tag
Once your image has been built, you can execute it by using the following straightforward command :
docker run -it my-image:my-tag "python3 ./main.py"
With the help of this command, you will have access to a shell session within the container that you can use however you choose. Open a new terminal window while the one in the container is still open and type
docker ps
To see the following output in order to better comprehend the concept at this point :

“docker ps” output
You may see your currently running container by setting the IMAGE column to your new image, which will display the one that is displayed there. There is one little exception, though: if you end the shell session inside the container by typing CTRL+D or exit, your container will shut down and “docker ps” will produce nothing.
The reason for this behaviour is straightforward: when you ran the runner command above as :
docker run -it my-image:my-tag "python3 ./main.py"
You essentially instructed Docker to start this container with the “python3 ./main.py” process as the main process inside the container. This means that once your process is dead, which happens when you exit the shell session, your container will die, simply as that. 🙋🏻♂️
Push image to DockerHub 📌
If you want to publish your Docker images, I advise pushing your most recent creation to DockerHub.
Create a DockerHub account first at https://hub.docker.com
Using the CLI, sign in to your DockerHub account :
docker login
- You can also log out from your CLI using:
docker logout
Furthermore, you can push your newly created Docker image by first tagging it.
docker tag <image> my-image:my-tag
<DOCKER_HUB_USERNAME>/dockerhub:my-image
Next, push the Docker image :
docker push <DOCKER_HUB_USERNAME>/dockerhub:my-image
Conclusion 🤔
Anyone who feels unprepared to learn about Docker may find this post helpful. The hardest part of finishing something is frequently beginning it. If this was helpful or if I missed anything, kindly let me know!

GitHub URL for this article 💻
Connect with Me on Social Media
🐦 Follow me on Twitter: devangtomar7
🔗 Connect with me on LinkedIn: devangtomar
📷 Check out my Instagram: be_ayushmann
Ⓜ️ Checkout my blogs on Medium: Devang Tomar
#️⃣ Checkout my blogs on Hashnode: devangtomar
🧑💻 Checkout my blogs on Dev.to: devangtomar